Yup, we have all been there, one buys expensive Mimo ( Multiple In/ Multiple Out ) WIFI routers with 2 or more antennas after having done extensive online research on what to buy. But, vendors dont really tell you how to set up a proper WIFI setup that is optimized for maximum bandwidth & coverage. So, before you start cursing the seller, fear not, WIFI reception problems can be fixed as explained below.

Take above example, where one has multiple wifi access devices sharing a wifi router. Due to some unavoidable circumstances such as number of walls, dead spots where you get zero reception, interference of cordless phones, microwaves between wifi router and client devices etc, you end with very poor reception. But, this can be fixed by relocating the wifi router to a different part of the premises if its possible, or, take existing wifi equipment and boosting the reception, using items found at home, without buying additional wifi routers/ repeaters depending on how large the house is.
How a WIFI router works is - transmit the signals in all directions, therefore they are called " omni directional ". Now, if you want wifi coverage only inside the premises, there would be no point allowing wifi signals to broadcast outside said premises. So, how does one make an omni directional to a directional antenna without spending more money on specific antennas. You build it yourself taking existing omni directional antenna and make it directional.

Following household items are required to boost wifi reception -
1) WIFI N spec Router with 2 or more antennas
2) Cardboard
3) Scissors
4) Duct tape
5) Waste bin
6) Big Juice Strainer
7) Aluminium Foil
8) Wifi Analyser android app or similar app
Following experiment uses two WIFI N spec routers, router 1 - 2 omni directional antennas and, router 2 - an antenna-less " travel " WIFI N spec router.
- Take a piece of thick cardboard [ otherwise it wont be able to stand vertically for long ] and cut it to this shape as seen here, have to specify, height of the cardboard has to be larger than the wifi antenna on the router, otherwise, part of the wifi goes out of the house and some re focus into the house.
 |
| cardboard for directional wifi reception |
- Duct tape above cardboard and then fold on the two sides as seen here thus making a directional antenna. Why duct tape it, then, this flimsy cardboard becomes durable, water resistant and looks rather cool for example. You can if you like, pass through some fishing tackle wire from left to right lids, so it holds that bent shape indefinitely. I simply kept a old laptop hard disk behind this booster stand so it doesnt fall down backwards.
 |
| partially completed wifi reception booster |
- Lastly, take aluminium foil and wrap completely the cardboard directional antenna stand, making sure, if possible, depending on type of foil used, where one side is dull & other shiny, to put the shiny side facing inwards so it reflects wifi signals back towards the front of the router as seen below.

- Does the aluminium foil have to be crumpled as seen in this picture, well, nope. I salvaged this foil used to make my dinner.
- The big heatsink as seen here, on top of the router is an optional add-on, where it is used for cooling the router, does it need a fan ? or do you even need a heatsink ? that is entirely upto the end user.
Without wifi booster -

With wifi booster -
 |
| Router 1 - Boosted |
 |
| Router 2 - Boosted |
- Considering Router 2 is an antenna less device, the improvement of reception with the aluminium booster did take me by surprise. Tho the router 2 booster was just assembled without using any cardboard, to see if there was a noticeable difference, there was a big one. Therefore, a proper shield made with cardboard as seen being used for router 1 or with similar material will be built within the day. Overall - this was a successful & fun project indeed.
 |
| temporary make shift wifi booster for router 2 |
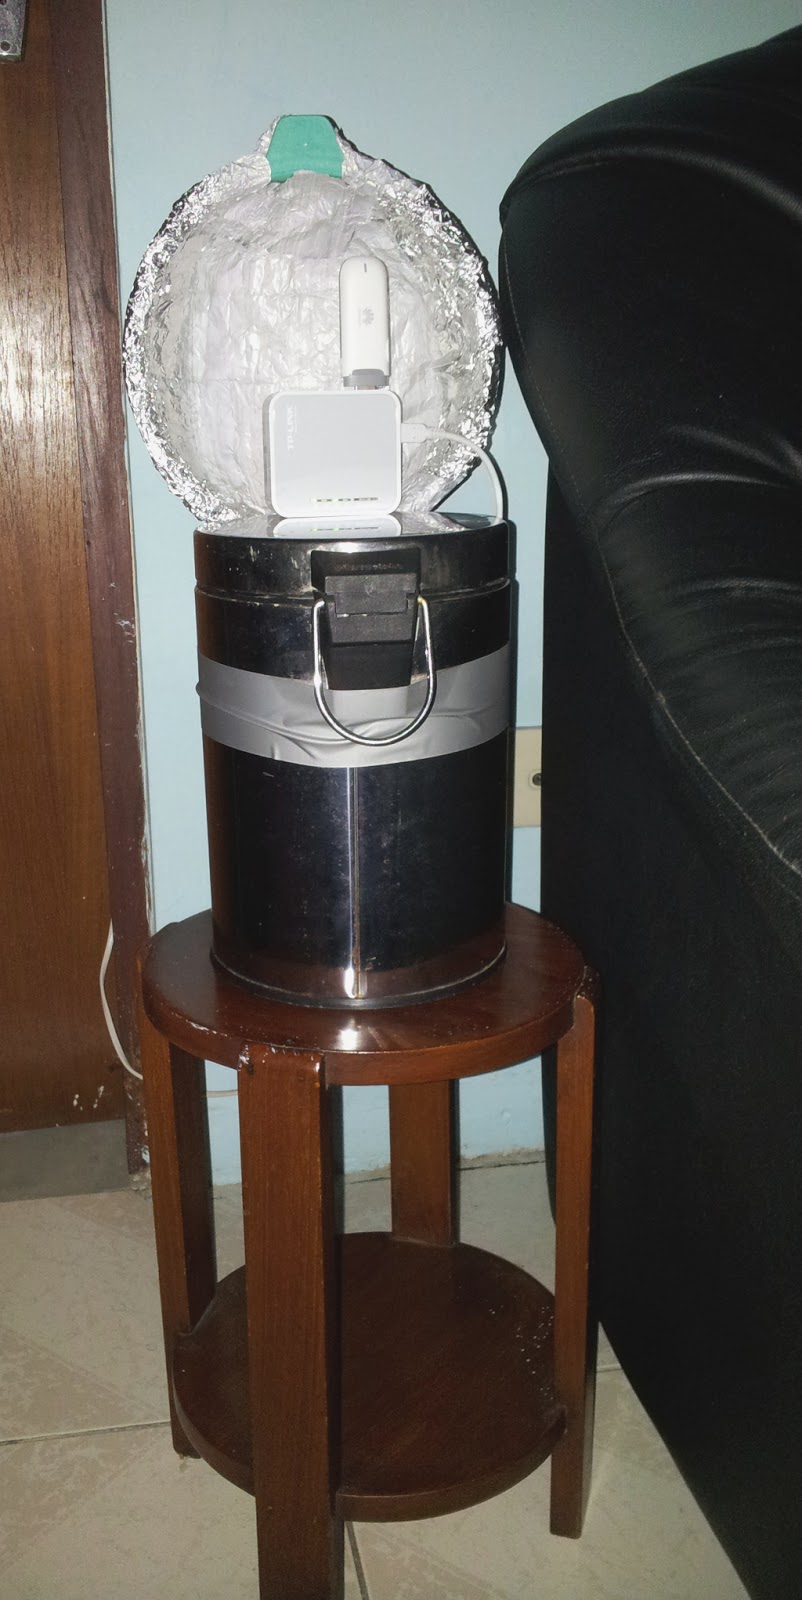
- Better wifi reflector was built afterwards using a juice strainer and some duct tape mounted on a wastebin. On a plus side, this whole unit can be moved with ease depending on the end user.

- After proper reflector was made using juice strainer, wifi reception dramatically improved. I chose a plastic juice strainer as opposed to metal strainer coz former is very light weight and if duct taped completely around the wastebin, it should hold in place for longer as opposed to just using a piece of duct tape measuring just 5 inches in length. Also do note both sides of the strainer was covered in using a " single " piece of aluminium foil.


 |
| further boosted wifi reception on Router 2 |
- Out of curiosity, i changed the Router 2 orientation from landscape to portrait and to my utter shock, it further improved reception. Therefore one can deduce, even tho this router is a omni directional, signals transmit top to bottom direction or as seen here - front to back of router. Thus this parabolic antenna re focuses & concentrates omni directional wifi signals.
- Do note, once this booster is installed on the router, you will loose some wifi signal coverage if you were to stand behind it, as this [ aluminium directional booster ] converts omni directional to directional. Proper placement of router + booster shield is key if one wants to enjoy better wifi reception.
- As a further signal improvement test, I raised the whole unit by 2 feet off the ground and to my shock, it further boosted wifi reception. Which brings me to this conclusion - higher the wifi antenna in relation to physical obstructions in house, better signal coverage. When tested with/ without aluminium parabolic shield, there was a sharp drop in signal strength [ -40 dbm with shield / -70 dbm without shield measured 150 feet away from device ] having being kept exactly at same position - 2 feet of the ground.
- As seen on wifi analyser, best signal coverage is between -60 dbm & -40 dbm.
 | ||
Raised off the ground by 2 feet
|

- You can also make this booster out of a beer can or two - one reflector per antenna or one big reflector for all antennas.

Pretty good post with amazing results. Nicely made antennas. I knew this but never have tried. Good to know that it really works and worth trying. Cheers.
ReplyDeleteyeah well, most of info you get online is bullshit. but, i also heard bout this, a long time ago, but never got around to it. infact, i had already built the shield with duct tape for router 1 and was kept as seen in the pics above but never did wrap it in aluminium foil until 2 days ago. I was skeptical myself but results are pretty awsome. do have to stress your " travel " router has to stand on its side and not lay flat to get even better results. you also have another device which is " antenna-less .. so you can implement this on both those devices. but, " line of sight " always preferred. thats why i re arranged location of router 1. was kinda bored on the 1st jan, and i had zero calendar " to do " entries for that day, which was unbelievable coz am always busy and all, i decided to build this.. since the shield was half built, all it needed was aluminium foil, which i had in the kitchen. then, was the tiring job of hand holding the wifi scanner and walking around the house to collect the data for the article. Then, article was written between 1 AM and 7 AM... wifi signals on " travel router " travel in both directions so if you place it flat on something, part of the signal becomes blocked. i didnt even know that till i put it vertical. come to think of it, router 1 is vertical anyways coz of the position of the external antennas. also, the strainer [ now aluminium ] & wastebin also aluminium, if u did look closer.. lol. total cost of this - Rs.400 bucks [ juice strainer 120, aluminium another 170ish ], duct tape i already had but if your buying it, its 400 bucks, available at any good hardware store.
ReplyDeletethis does stabilize wifi reception in a home but, it wont double your internet speeds from 3 MBps to 10 MBps, as claimed by someone online. Internet speed cant be controlled at customer premises. But, i noticed a more stable internet connection after this was put up. Earlier, when doing speed tests, speed would fluctuate continuously but with this... that stopped. maybe it was coz of the time i ran this speed test, i dunno.
ReplyDeleteI'm impressed, I have to admit. Seldom do I come across a blog that's both educative and entertaining, and let me tell you, you've hit the nail on the head. The issue is something which not enough folks are speaking intelligently about. I am very happy I found this in my search for something relating to this. Best Wifi Booster To Buy Now
ReplyDelete